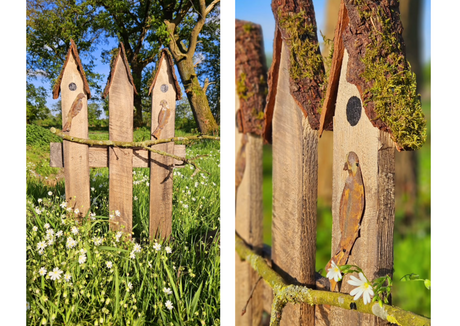

Welcome to our new DIY project for a Scandinavian-style decorative house made from reclaimed wood ! In this tutorial, we'll take you on a creative journey to discover how to create a charming decorative house using recycled wood. Our goal is to show you, step by step, how to create a unique home accessory using simple materials and your personal touch. The Scandinavian style is characterized by its understated elegance and natural elements, and this is precisely the atmosphere we want to capture in our DIY project.
Let yourself be inspired and immerse yourself in the world of Scandinavian design to create your own cozy little house. Have fun on this creative adventure, where you can conjure up a unique decoration from reclaimed wood and your imagination!
Materials needed:
- Old edge timber or old beam
- saw
- set square or flat angle
- Paint and brush (optional)
Step 1: Preparing the wood
- Take an old piece of wood or an old beam and saw the piece of wood into the desired size for the decorative houses.
Step 2: Create the roof shape
- Using a set square or a flat square, draw the roof shape as a triangle onto the piece of wood. Saw along the marked line to create the roof shape.
Step 3: Designing the houses
- The houses can be painted according to your wishes or left in their natural wood look.
In the following instructions, we will gladly show you how to decorate the DIY wooden houses on a wooden slice.
Required materials
- wooden disc
- drill
- Small collected twigs
- hot glue gun
- Thin rope
- String lights (optional)
- Candles or pine cones (optional)
Building a garden fence:
Step 1: Prepare the wooden disc
- Take a large wooden disc and drill holes around the outside of the disc at small intervals.
Step 2: Securing the branches
- Insert small collected twigs into the drilled holes and secure them with a hot glue gun. Use a thin rope to create a fence around the inserted twigs. The thin rope can also be attached to the twigs with the hot glue gun.
Step 3: Placing the decorative houses
- Place the little houses in the center of the wooden disc. For a more natural look, you can cut additional holes in the disc and tuck larger branches behind the decorative houses to create the impression of trees.
Step 4: The final touches
- For a warm atmosphere, you can hang fairy lights on the branches and place a glass candle holder next to the decorative houses. If there is still enough space on the wooden slice, you can add further decorations, such as pine cones.
We hope you enjoy your self-designed Scandinavian decorative cottage and charming garden fence. This unique creation will lend your space a cozy atmosphere with a touch of Scandinavian aesthetics.
Click here for the video tutorial: