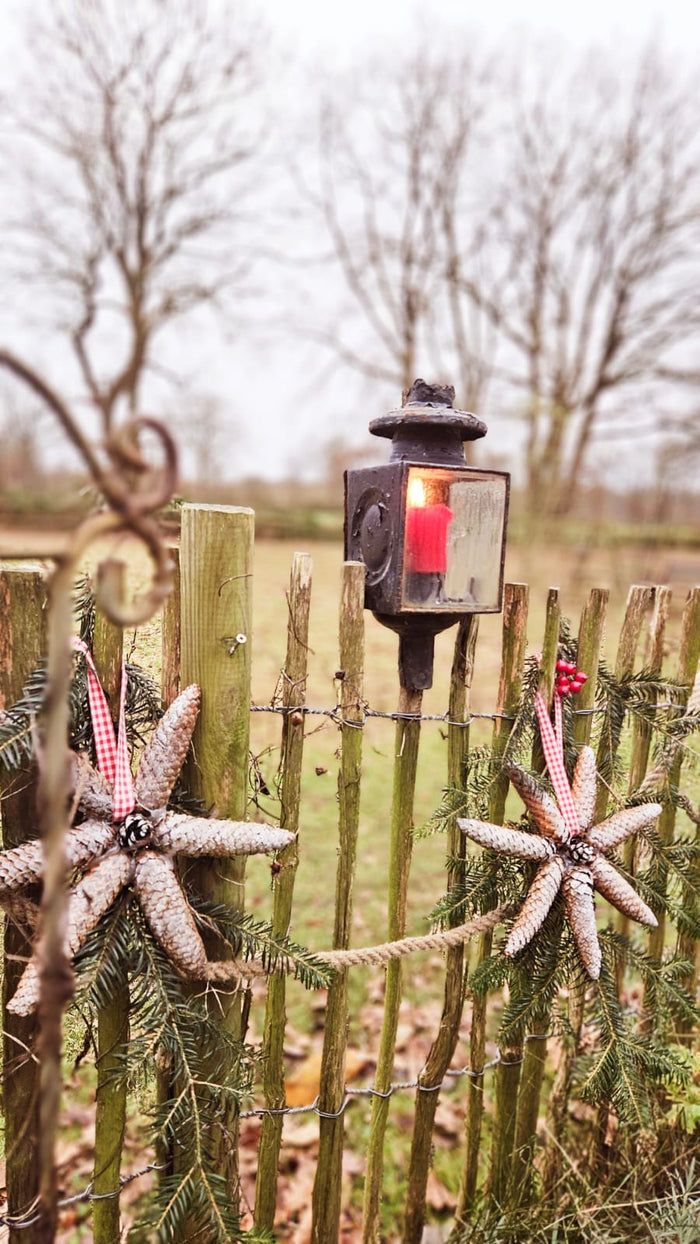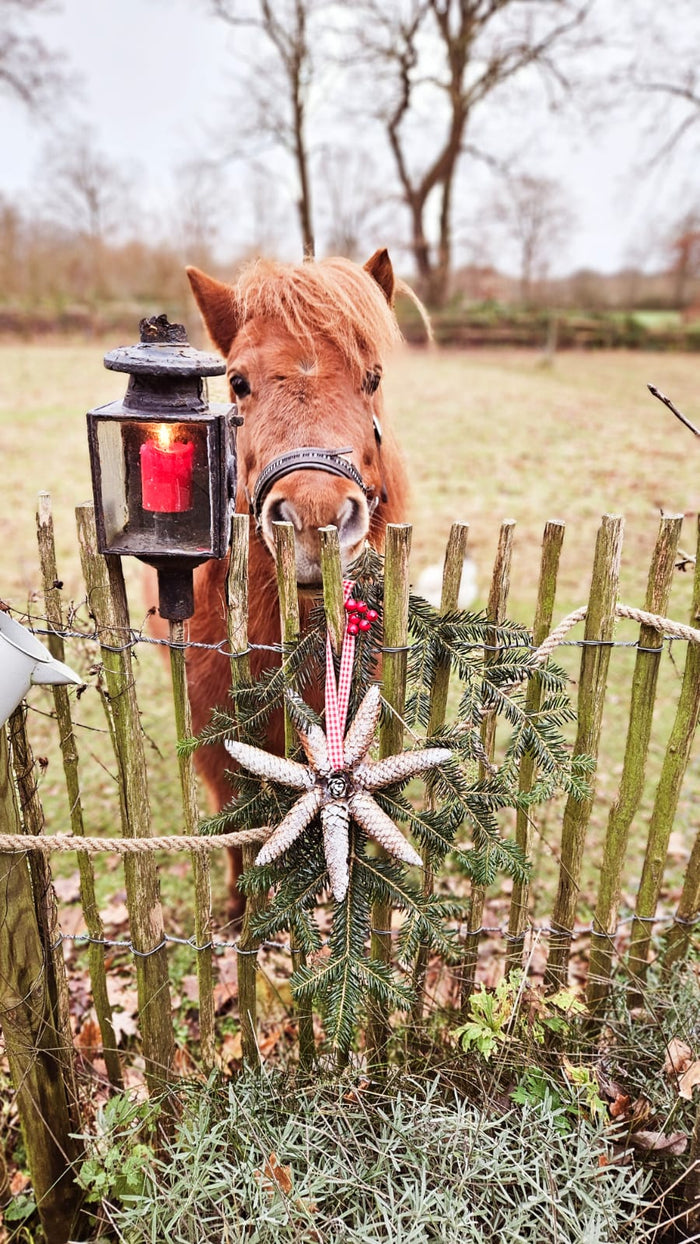
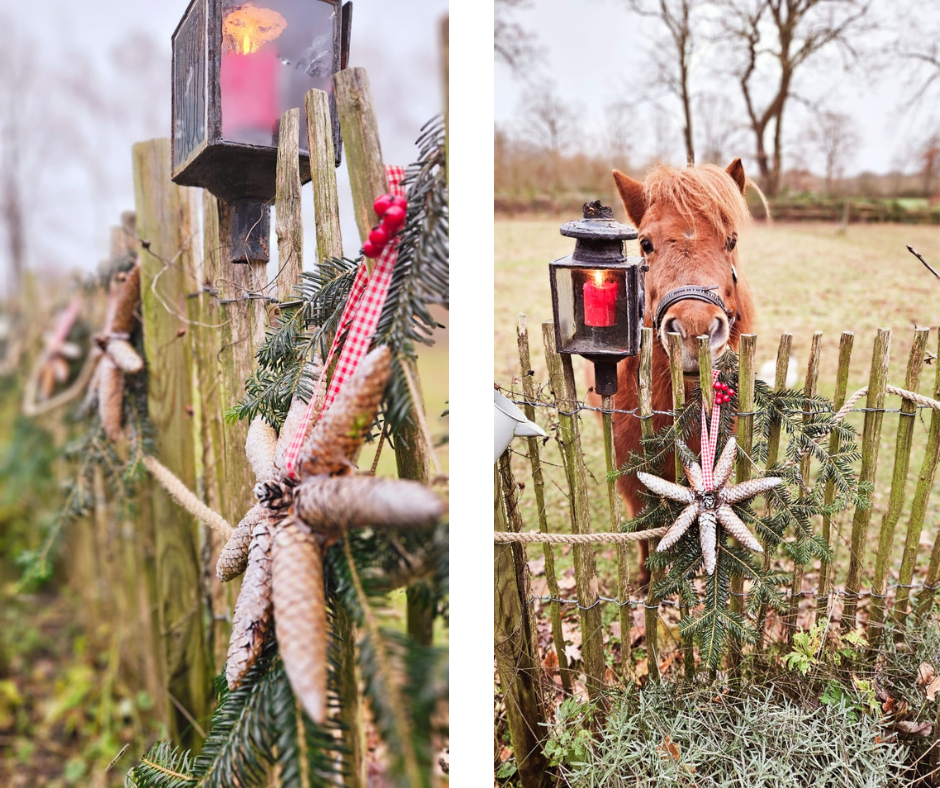
There's hardly anything better than getting creative at Christmastime and crafting festive decorations with natural materials. Today I'll show you how to conjure up a beautiful, rustic garland from pine cones, fir branches, and a few craft supplies – perfect for fences, windows, or as a festive eye-catcher in your home. This project is not only easy to do but also a wonderful way to get into the holiday spirit. So, let's get started!
What you will need:
- Pine cones (various sizes, ideally collected during a walk in the woods)
- Hot glue
- Acrylic paint (e.g. white or silver for a frosty look)
- Rope (or a fixed cord as a base)
- Decorative ribbon (Christmas-themed, e.g. in red or gold)
- Fir greenery (fresh or artificial)
Step-by-step instructions for your DIY star garland
Step 1: Collect pine cones
- A winter walk in the woods is not only wonderfully relaxing, but also provides the perfect basis for your garland. Look for different pine cones and take a few home with you.
Step 2: Let the pine cones dry
- Before you begin, it's important to let the pine cones dry thoroughly. Place them in a warm spot for one to two days. This will prevent moisture from damaging the materials.
Step 3: Glue the pine cones together
- Take the hot glue gun and carefully glue the ends of the cones together. This will create a stable base for your stars.
Step 4: Glue pine cones in the middle
- For a particularly decorative centerpiece for your garland, glue a large pine cone in the middle. This gives the star a harmonious symmetry.
Step 5: Create a frosty look with acrylic paint
- To create a wintry atmosphere, paint the tips of the pinecones with white or silver acrylic paint. Use light pressure to achieve a delicate frosted effect. Allow the paint to dry completely before proceeding.
Step 6: Attach the rope and fir branches
- Attach the rope to the spot where you want to hang the garland – for example, a fence or a window. Wrap the evergreen branches loosely around the rope to give the garland a natural and full look.
Step 7: Attach decorative ribbon to the pine cones
- Cut small pieces of decorative ribbon and attach them to the pinecone windows. Choose colors that match the rest of your Christmas decorations.
Step 8: Attach pine cones to the rope
- Now attach the individual pine cones to the rope. Vary the spacing to create a lively and dynamic look. Make sure everything is securely fastened.
Congratulations! Your Christmas garland is finished and ready to be admired. This DIY project can be wonderfully adapted to your personal style. Why not try different colors or add extra elements like small Christmas baubles or LED fairy lights? Let your creativity run wild!
We wish you lots of fun crafting and a magical Christmas season! 🎅✨
Click here for the video tutorial: