
Materials needed:
- Old pallet truck
- Sandpaper or sanding machine
- Black paint or spray paint for metal elements
- Three wooden boards (the width of the pallet truck)
- saw
- Black paint for the wooden boards
- Screws and screwdrivers
- Optional: two additional boards for the bracket
- First, we grab the old pallet truck and sand it thoroughly. Sanding not only removes old paint residue and dirt, but also perfectly prepares the wood for the next step.
- If you want to further enhance the rustic look of your pallet trolley, paint or spray the metal elements black. This will give the trolley a sleek, industrial flair. Allow the paint to dry thoroughly before proceeding.
- Now we take three wooden boards and saw them to the width of the pallet truck. These boards will later form our backrest. It's like cutting out puzzle pieces that fit together perfectly.
- To ensure the backrest visually matches the pallet truck, we'll also paint the boards black. This gives them a uniform look and allows them to blend seamlessly into the overall design. Allow the paint to dry thoroughly before proceeding.
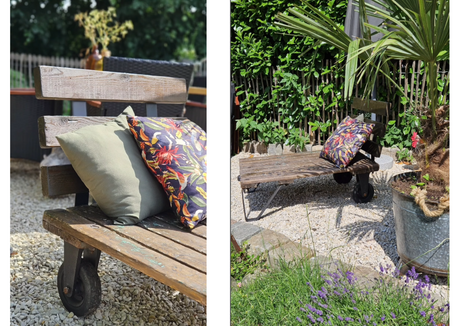
- If the existing frame for pushing the trolley is still there, attach the boards to it. If the frame is missing, cut two additional boards to serve as supports. Screw these firmly to the pallet truck and then attach the backrest to them. Make sure everything is stable and secure so you can relax comfortably later.
- Your rustic garden lounger is almost finished! Make sure all the screws are tight and the backrest is stable. Place a comfortable cushion or a cozy blanket on it, and perhaps a few colorful pillows for extra comfort.
Click here for the video tutorial:
View this post on Instagram