
Welcome to our special DIY adventure for magical lighting made from old tree trunks and tea lights! Here we take you on a creative journey where you have the opportunity to create an atmosphere of warmth and coziness with simple materials and a touch of magic.
Together, we'll transform old tree trunks into small works of art that will bathe your home in a soft light and create a romantic atmosphere. With every touch, you'll give the tree trunks a unique personality, while the flickering tea lights will create a fairytale aura.
Follow our step-by-step instructions, unleash your creativity, and discover how this DIY project can bring not only light but also a cozy and welcoming atmosphere to your home. Immerse yourself in the world of handmade items and experience how old tree trunks and tea lights can be transformed into an inviting light fixture that brings not only light but also love into your home. Enjoy this magical DIY experience!
Materials needed:
- Tree trunk in the desired length
- saw
- branch with a thicker diameter
- drill
- glue
- Small hooks
- Willow branches, acorns, pine cones, moss or similar decorative elements
Step 1: A touch of natural magic
- Begin your DIY adventure by sawing off a piece of the tree trunk to your desired length. This will create the foundation for your unique garden lighting.
Step 2: Positioning your feet – indentations for stability
- To create the bases for your garden lights, saw two notches into what will be the underside, each perfectly sized to fit a thick tree branch. This will not only give your artwork stability but also a natural charm.
Step 3: A place for the light – drilling with feeling
- Now, carefully drill a hole into the top of the tree trunk, going slightly into the trunk but not all the way through. Then you can carve a branch so that it fits perfectly into the hole.
Step 4: The branch finds its place – stability through glue
- Gently insert the branch into the charming hole. For extra hold and a long-lasting connection, you can secure the branch with a little glue.
Step 5: Shedding light on the darkness – Small hooks for the tea lights
- Your artwork is taking shape! Now attach small hooks to the branch to provide a secure place for the tea lights.
Step 6: The final touch of magic – nature meets decoration
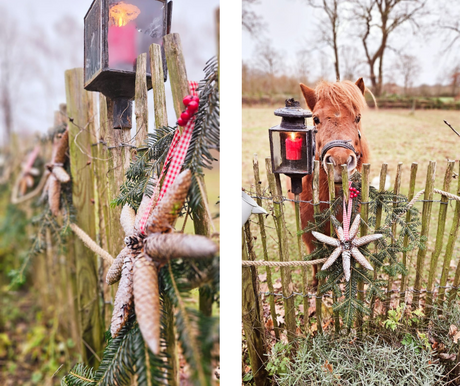
- Almost finished! Let your creativity run wild and decorate the tree trunk and branch with willow twigs, acorns, pine cones, moss, or other natural treasures. This will create not just garden lighting, but an artistic natural ensemble.
Bathe your home in the warm glow of this homemade garden lighting. May your DIY project bring warmth and light to your evenings in the garden!
Click here for the video tutorial: